Tidy Up
Grunt's "Tidy up"-function lets you quickly align and distribute your objects so that they are an equal distance apart - either along a vertical or horizontal axis or in a grid. The "Tidy up"-function is intelligent and will try to determine your intent automatically. To start using, make sure Smart Selection is toggled on in the Grunt ribbon, and follow these steps:
- Select the objects you want to distribute.
- Click the pink "Tidy up" button in the bottom right corner of your selection.
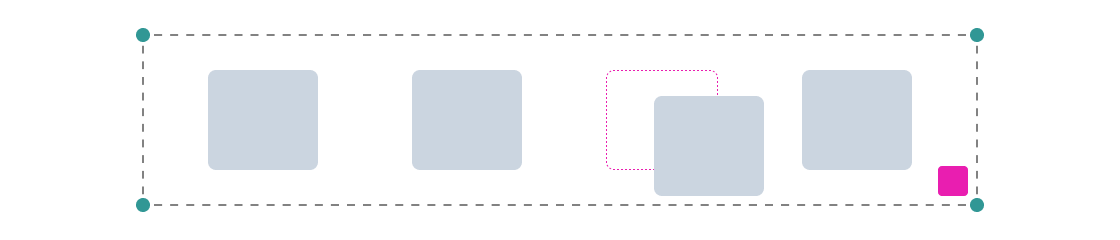 One of the following will then happen:
- Objects will be distributed along a single axis — either horizontal or vertical. This will be determined by which axis the objects overlap. Objects aligned on a horizontal axis will have their horizontal spacing adjusted, while objects aligned on a vertical axis will have their vertical spacing adjusted.
- If you select objects placed in a grid-like structure, their vertical and horizontal spacing will be adjusted. Depending on their starting position, the spacing may be the same or unique.
Tip:
To get a preview of what Tidy Up will do, select the objects you want to adjust and hover the mouse on the Tidy Up button.
Smart Spacing
When objects are "tidied up" (e.g., with equal spacing), Grunt's Smart Spacing feature makes it easy to adjust their spacing.
- Select all the objects you want to adjust spacing between.
- Drag the pink handle that appears in between your objects until the wanted spacing is achieved. Release the cursor to apply.
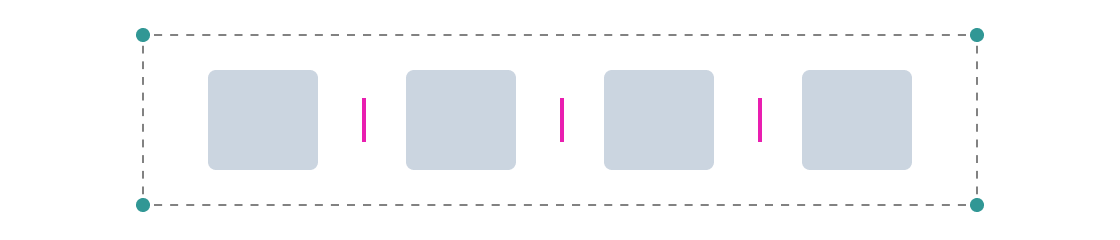 Hovering over the pink handles will give you a tooltip with the distance between objects in pixels. Note that "Smart selection" must be toggled on for the handles to appear.
Tip:
Hold Ctrl when dragging to space the objects out symmetrically from the center.
Smart Resizing
Smart Resizing changes the way objects resize, maintaining spacing between them as you adjust. To get started, ensure Smart Selection is toggled on, and follow these steps:
- Select all the objects you want to resize.
- Drag – either left, right, or in the corner of one of the objects – to adjust the size of all the selected objects simultaneously. Release the cursor to apply.
Tip:
Hold Ctrl to resize one or more objects symmetrically from the center.
Hold Shift to keep the aspect ratio fixed as you resize.
Deactivating Smart selection
Sometimes, Smart selection might not fit your workflow. To quickly turn it off, simply click the Smart selection icon in the Grunt ribbon. To reactivate, press the icon again.

Tip:
To deactivate Smart Selection only for a single selection, press Esc.