Using Azure AD's license provisioning system, you can automatically grant a license to Grunt to all members of a specific Azure AD group. This group can be the same as the one you use to control internal access to the Grunt installer and/or content and template locations.
Benefits
- Centralized control: Automatic provisioning and deprovisoning of Grunt licenses. Changes in your AD - typically the addition or removal of a user to/from a group - will automatically be reflected in Grunt's licensing system by either adding or removing a license (as the case may be)
- Include Grunt license management in your existing processes: Use your existing AD groups to manage access to Grunt.
Automatic license provisioning
This article will guide you through setting up SCIM with Azure AD for automatic user and license provisioning in Grunt.
Pre-requisites
- A Microsoft Entra ID Tenant
- Individual with Global Administrator rights for the Tenant
- A SCIM-enabled organization and an admin-user at Grunt (speak to your contact at Grunt, or reach out to us at sales@grunt.pro)
Process description
Microsoft's identity platform Entra comes with functionality to synchronize identity information using the standardized protocol SCIM (System for Cross-domain Identity Management).
Grunt uses the SCIM protocol to synchronize your user identity information with our user management API, enabling automatic provisioning of users and licenses form an application defined in your directory.
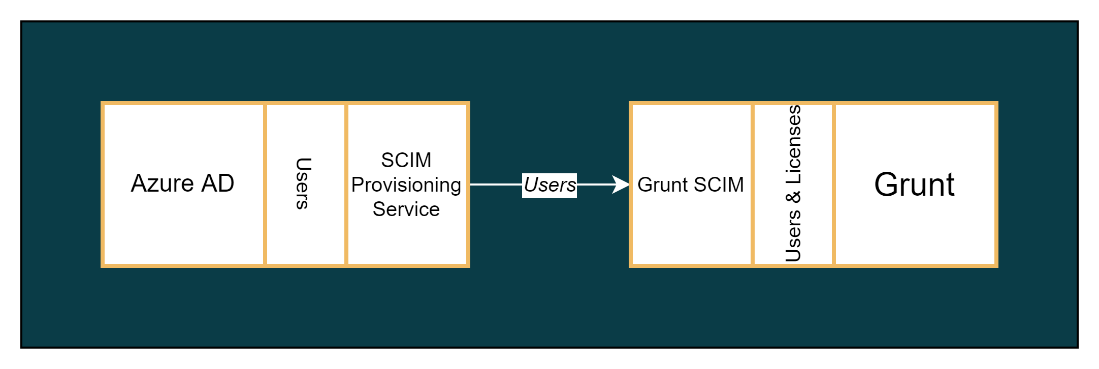
Once provisioning has been configured, the SCIM provisioning service will commence an interval-based synchronization process that will run every 40 minutes. If users are either added or removed from your defined application, users and licenses will automatically be either created/assigned or removed/unassigned.
Guide for setting up SCIM in your tenant
Get your SCIM token
Go to app.grunt.pro/login and log in with your admin-user (probably your own e-mail address). If you do not have a password, you can generate one by clicking Forgot password.
Click on your organization and navigate to Settings. If SCIM has been enabled for your organization, you will see an option to generate a SCIM token. Generate the token and store it somewhere temporarily.

Create your own Azure AD Enterprise App
We'll begin by creating an Azure AD Enterprise application that we'll configure to do the license provisioning.
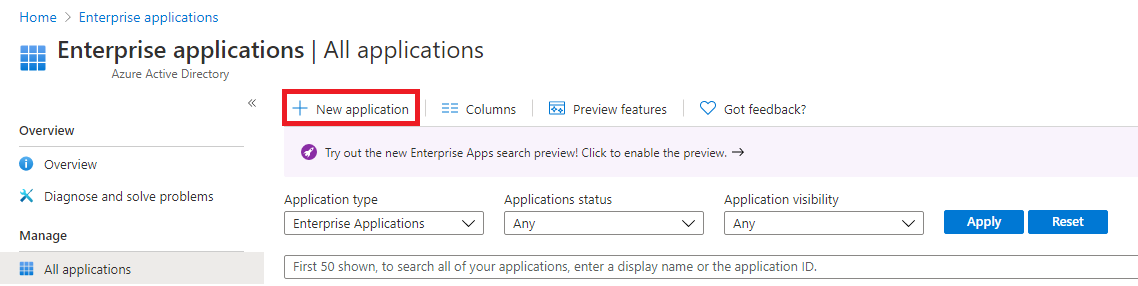
Head over to your Azure Portal and locate the "Enterprise applications" section of Microsoft Entra ID. Now click "New application".
Next, click "Create your own application", and choose the option "Integrate any other application you don't find in the gallery (Non-gallery)". Name your app "Grunt Provisioning" or similar.


Configure user provisioning
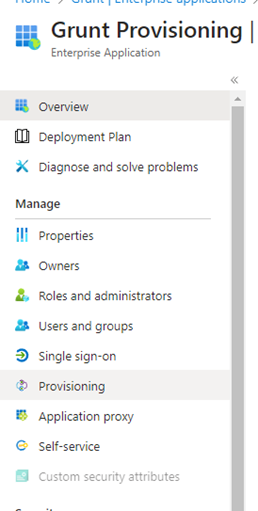
When the app has been created, click on Provisioning to go to the provisioning section of the application
Under provisioning, choose "Automatic" for provisioning mode and enter https://api.grunt.pro/scim as Tenant URL and enter the previously generated token in "Secret Token" field. Finally, click "Test Connection" to verify the token and the connection to Grunt's SCIM API. You can also optionally add support@grunt.pro as the recipient of any failure messages related to SCIM.

Configure attribute mapping
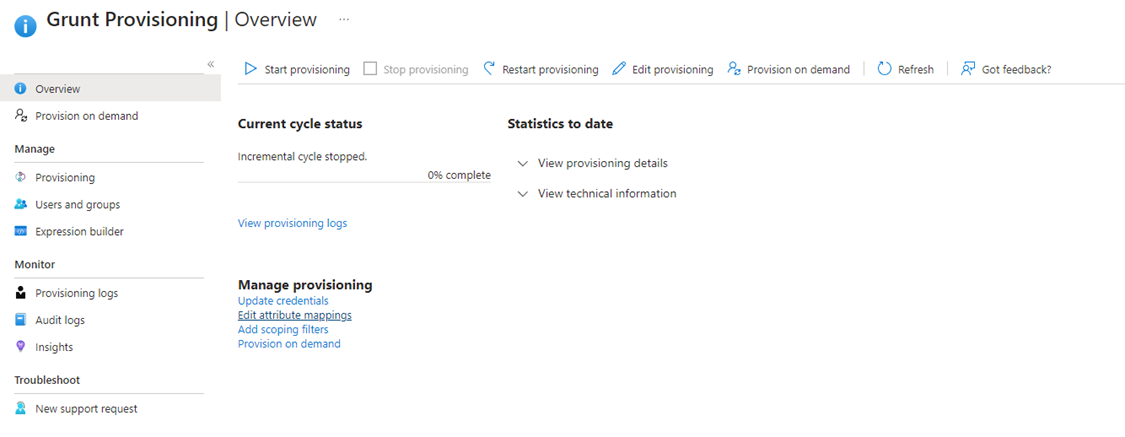
We're now ready to configure the attribute mappings of the app. Go back to the Grunt Provisioning overview by clicking "Overview" (top left).
Under "Manage provisioning", click "Edit attribute mappings"-
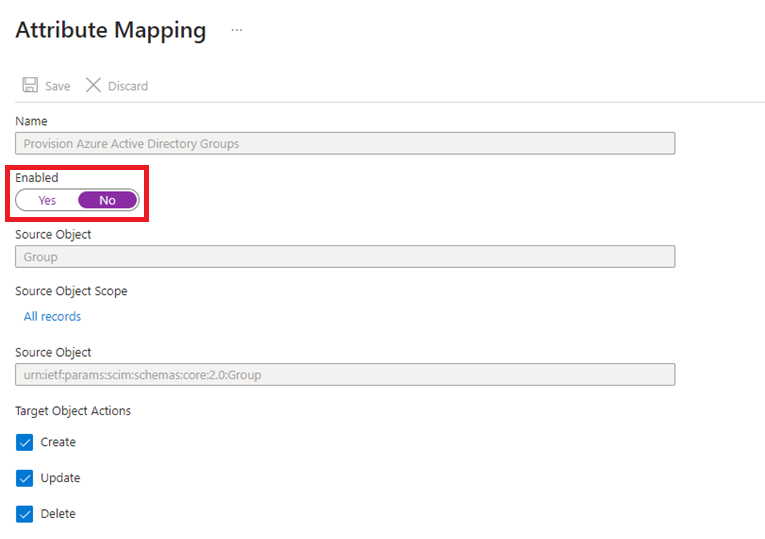
In the attribute mappings view, click on "Provision Azure Active Directory Groups"
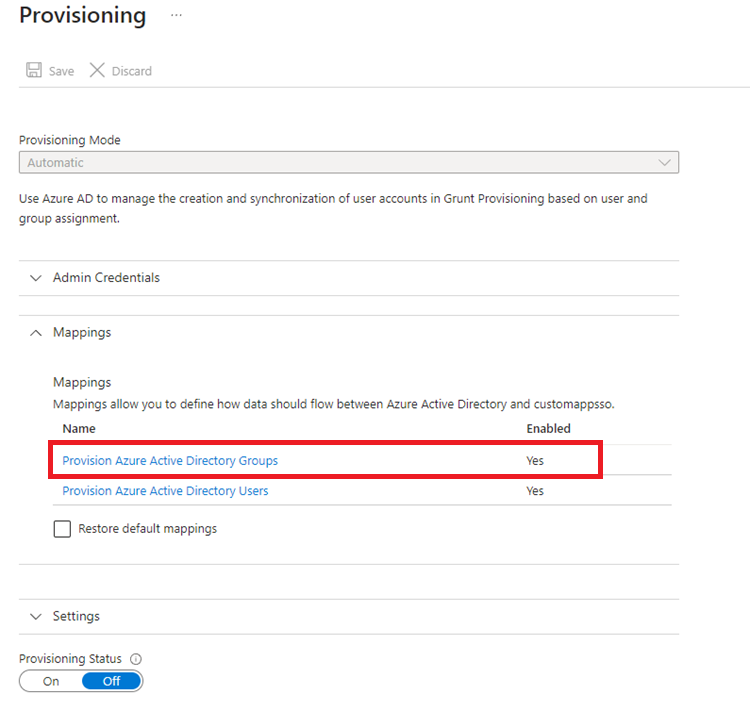
and toggle the attribute mapping Enabled state to "No" and Save your changes.
Assignment (provisioning scoping)
Next, it's time for a manual provisioning test. To do this, we will actually synchronize a single user with Grunt's licensing system.
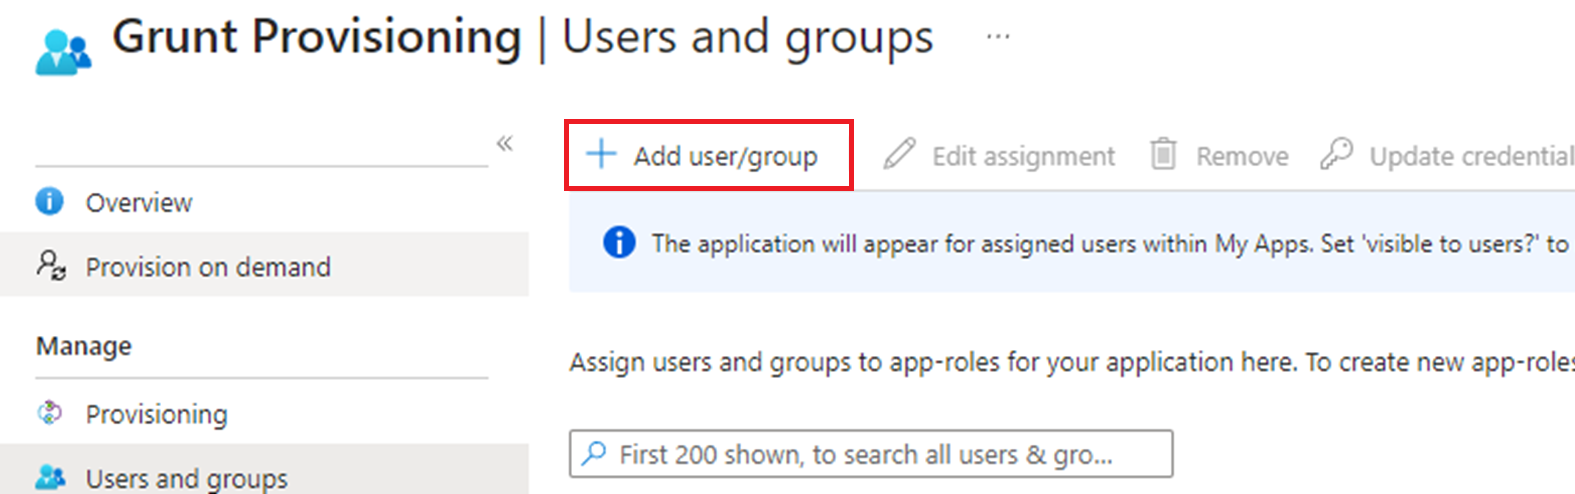
Go back to the Provisioning page and click Users and groups and then click the "+ Add user/group" button and search for and select a user.
Depending on the current state of available licenses for your organization in Grunt's licensing system, the following step will either
- Synchronize the selected user's licensing state with the app, or
- Assign an available license to the selected user, or
- Create and assign a license to the selected user
To avoid that a new license is added to your account, we recommend that you select a user that either already has a license assigned, or a user that you wish to have a license assigned.
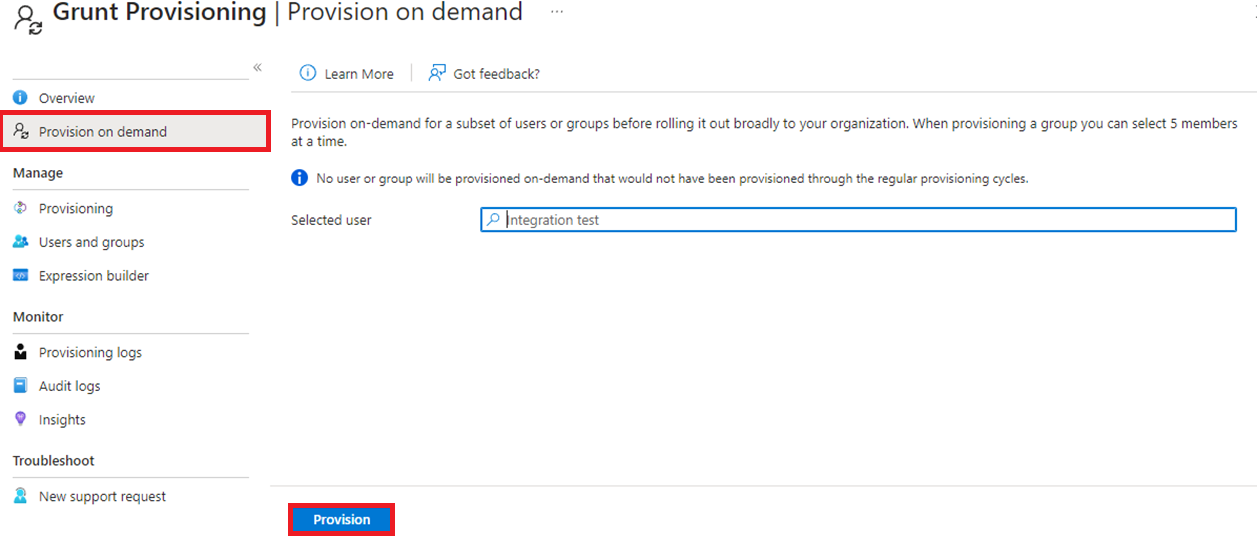
Once a user has been added, go back and click on “Provision on demand” and search for the newly added user. Finally, click "Provision" to begin synchronizing the newly added user.
Add all users
If the previous step was successful - namely that you were able to activate provisioning for the selected user - we are now ready to commence provisioning for the remaining users.
We recommend logging into the Grunt Portal and exporting all your current users to a CSV file. Use this list to identify users that you wish to add to the application you've created. For each user, follow the previous step of adding these users. This time however, we will not click "Provision" once you have added all your users. Rather, we will turn on the provisioning system for the entire app.
Note that it's also possible to add an entire group rather than one user at a time. This does not mean that the group object will stay in sync with Grunt (this requires a different setup such as provision scoping rules). Rather, adding the group may be quicker way to add users if you know that all users in a group should get a Grunt license. Remember that it is the e-mail that identifies the relationship between a user and a license. Any e-mail that is new to Grunt's licensing system will have a license assigned to it.
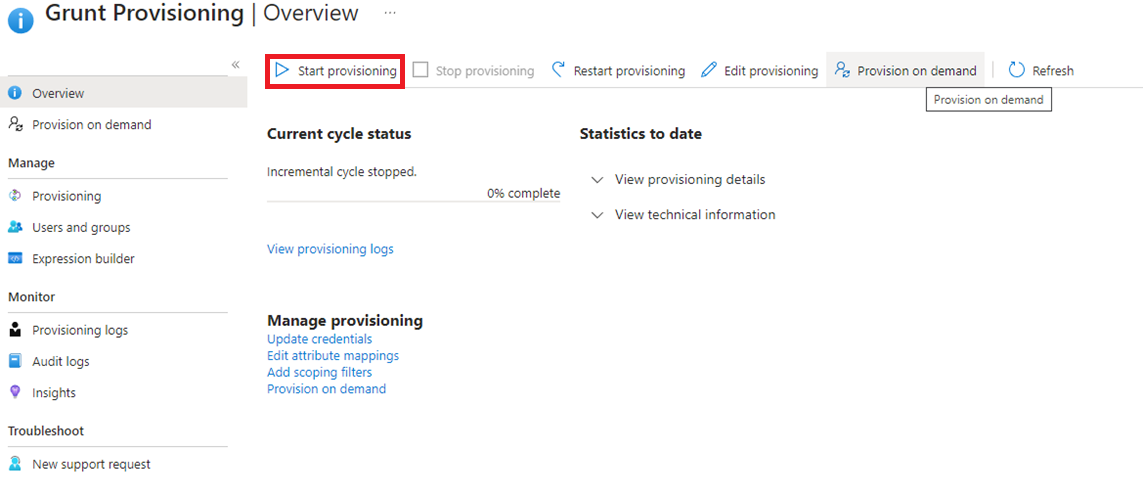
Start provisioning
With all your users added, we are now ready to activate provisioning. Go back to the Overview and click Start provisioning. This will start the interval-based synchronization process. Any user added to the app (or removed) will now automatically synchronize with Grunt's licensing system.
Finalization and scoping rules
We do recommend creating your own provisioning scoping rules for assigning users to the application, e.g. such that when a user is added to or removed from a group, it will automatically add or remove the user from the Grunt Provisioning app. This is one of the key advantages of having an Azure application in the first place - not only does it allow you to provision users, but it also allows you create rules for user provisioning that are automatic.