
The Icon conditional rule lets you add icons to your object based on specified conditions. It's great for reporting the status of your projects, to indicate up or down trends in a table or to make categories visually distinct.
Tip:
If you want the same icon to be applied to your entire target area, you can use the simpler Icon rule instead.
Properties

Conditions
This section specifies the icons, their color and and the specific condition when it should be displayed.
Click the + button to add new conditions, and click each condition to adjust its settings. You can choose from a number of different logical operators, in addtion to the commonly used "Equals". For instance, you can use the "Greater than" and "Less than" operators to display corresponding arrows for values above and below 0.

Tip:
When you select a range before adding this rule, Grunt will read the data in the ranges you selected and automatically create conditions.
Layout
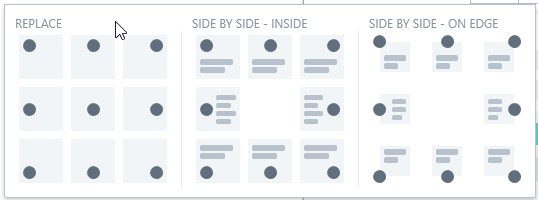
The icon can be placed in several different positions in its cell. To display only the icon, use the "replace" layouts or choose to display it together with the text, either side by side inside the cell or on the edge of the cell.
Size
This lets you update the width and/or height of the icons. For more on the different sizing modes, see the article on the Size rule.
Margin
Specify the margins for the icons. To learn more about using margins, check out our article on the Margin rule.